Introduction
We all have old smartphones that still work but can’t be used anymore because the manufacturer decided to abandon them. They don’t receive updates anymore; apps stop working, behave unpredictably, or get progressively slower.
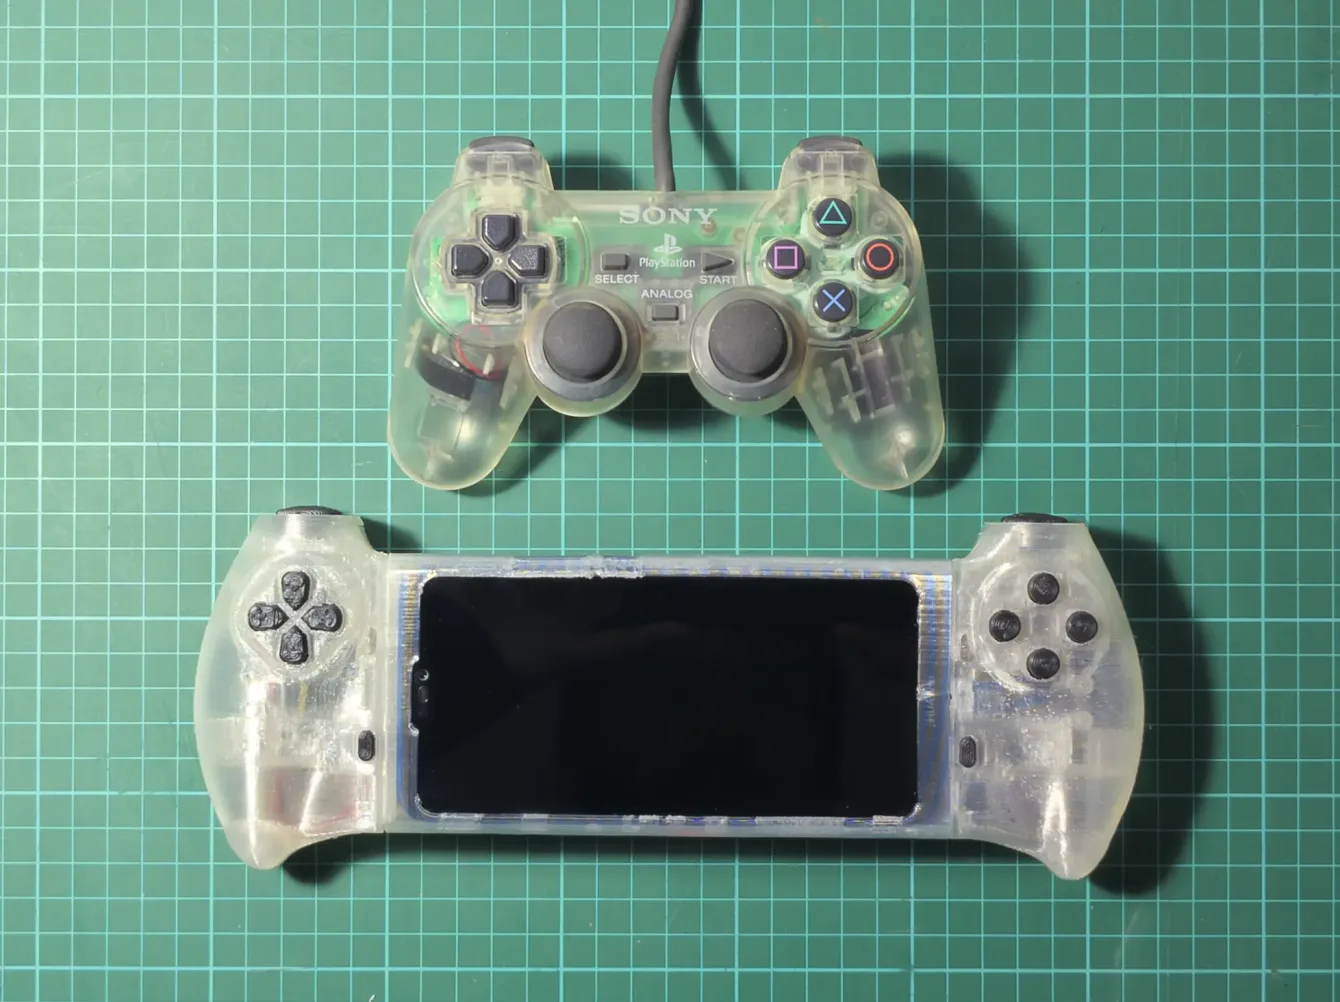
This project aims to reuse one of these old – but still capable – smartphones by turning it into a retrogaming handheld console.
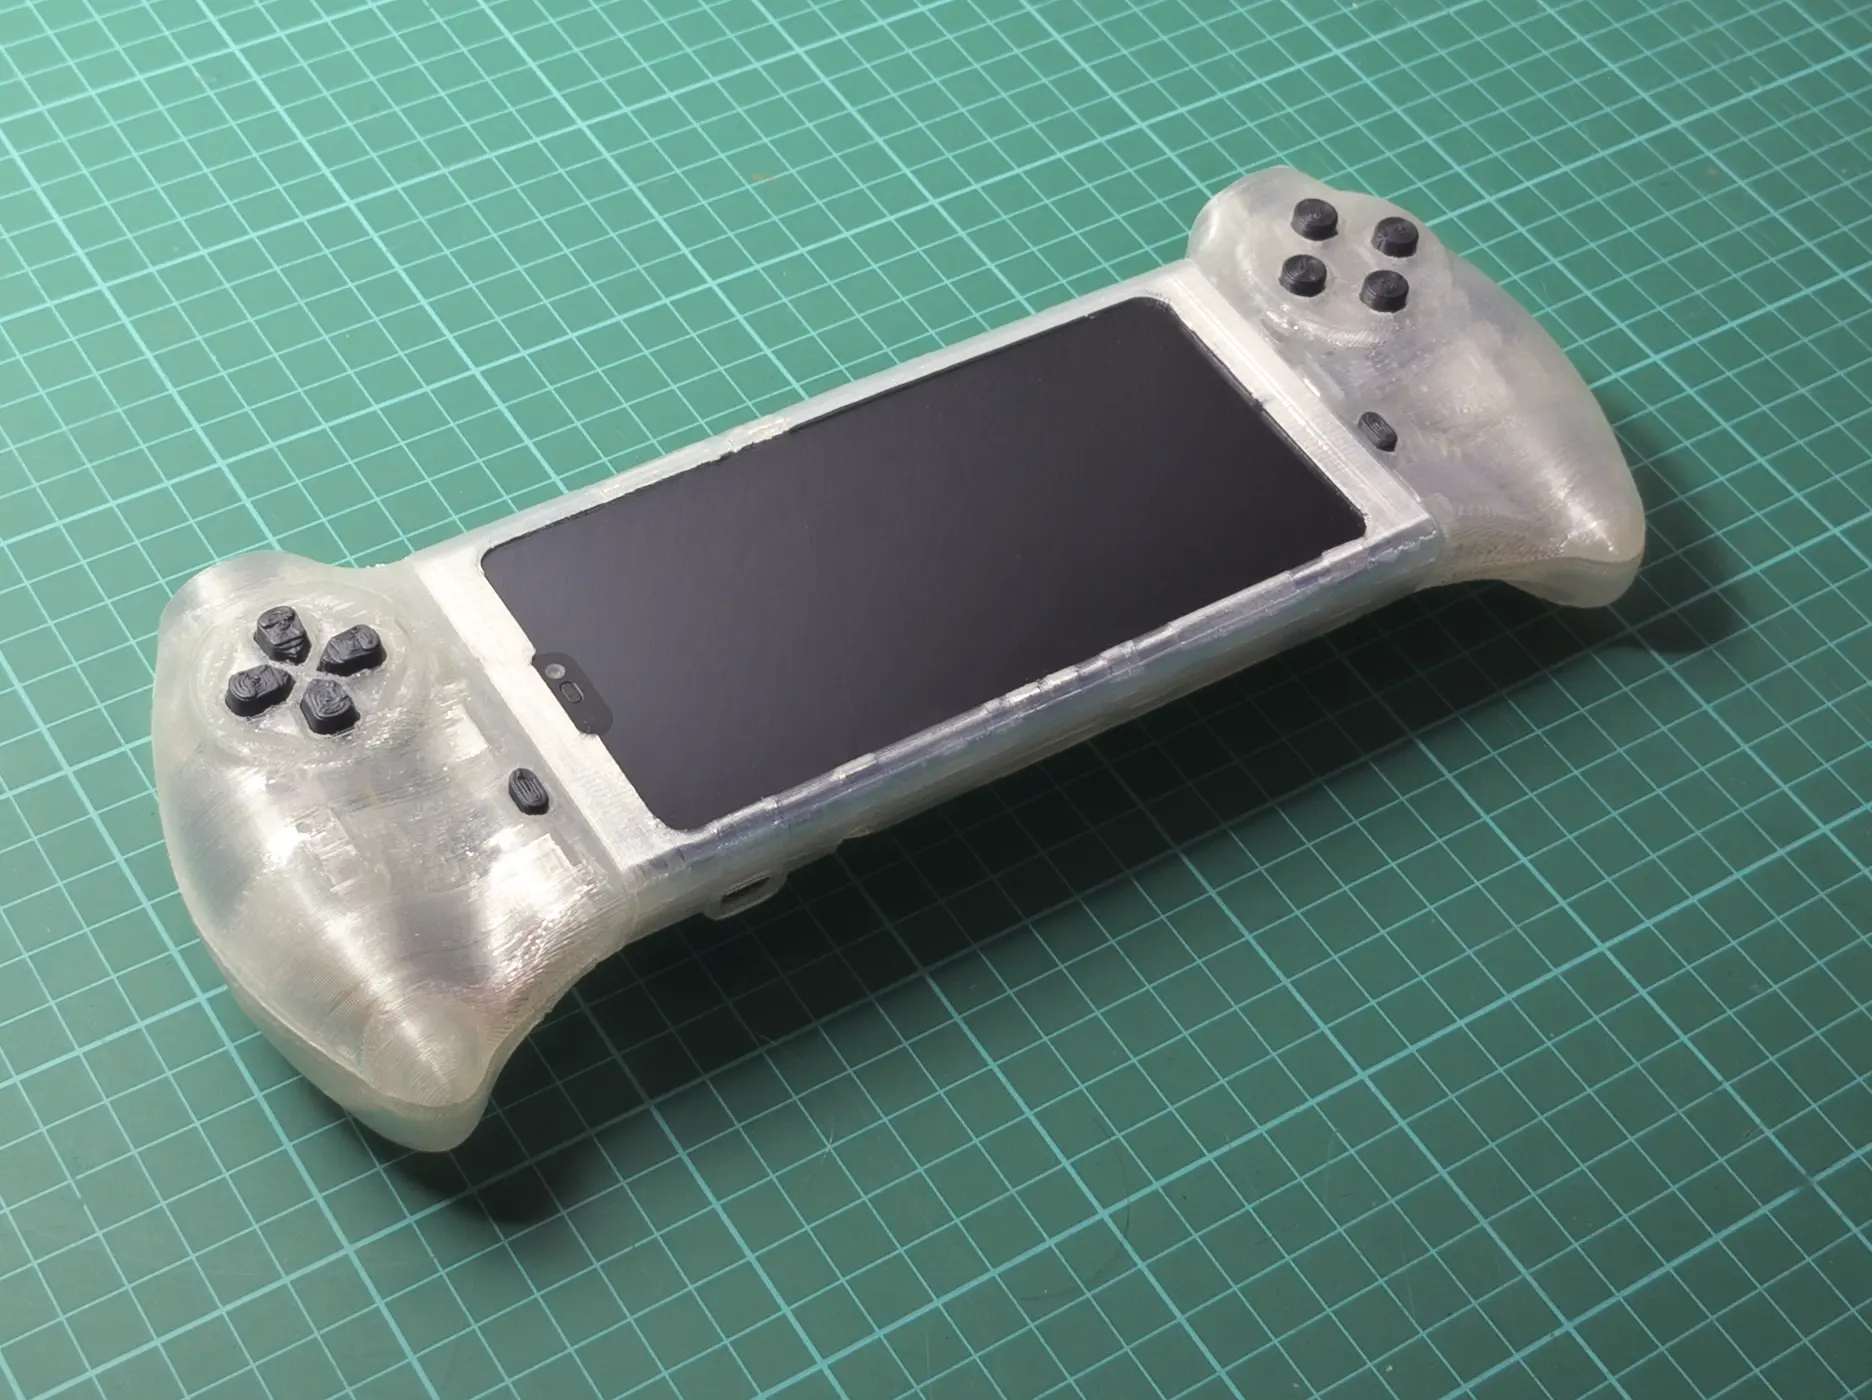
Table of contents
00 | Research
00 | Research |
Project scope
Scope
Saving an old smartphone, specifically a Huawei P20 lite from a life closed in a drawer – or worse, in a landfill – by turning it into a retrogaming handheld portable console.
Goals
- Good ergonomics: Design the controllers to reduce hand, wrist and elbow fatigue as much as possible.
- User friendliness: The final product must be usable by anyone without requiring specific knowledge on how it was made or what software is installed.
- Modular design: All the mods must be reversible. I have to be able to revert the mods and use the smartphone “as-a-smartphone” if I need to.
Constraints
- Smartphone (Huawei P20 lite) hardware limitations + soldering skills:
- The smartphone model (Huawei P20 lite) was chosen for no other reason than it was an old smartphone I already had.
- The P20 lite emulation capabilities are limited up to PS1 games (and not all of them at full speed). For this reason – and to make the soldering a bit easier – I decided not to include the analog joysticks for this project.
- FDM 3D printer (Anycubic Kossel Linear Plus):
- The parts need to be designed to be 3D printed by a (not that good) FDM 3D printer.
00 | Research |
Components and tools selection
Hardware
Hardware components used in the project.
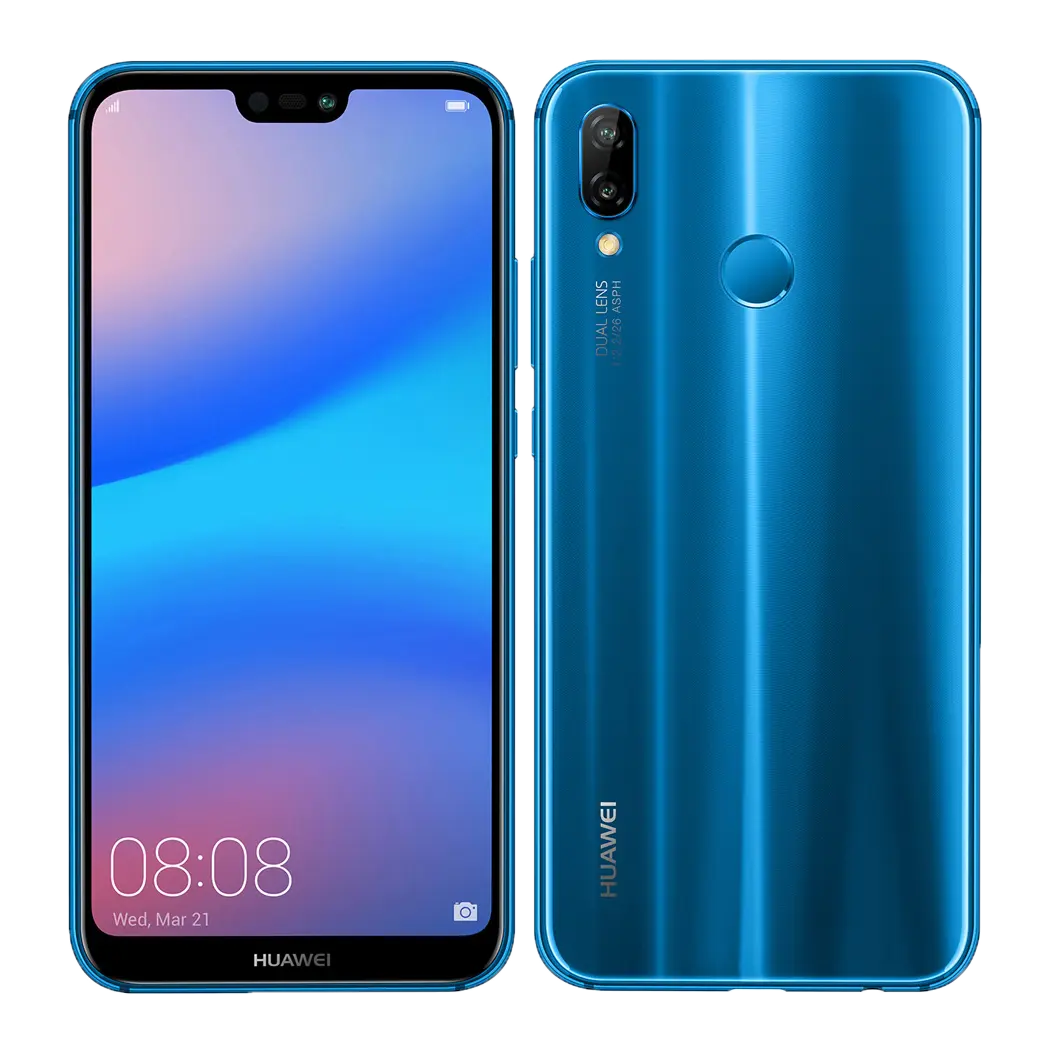
Smartphone
Huawei P20 lite
Picked for no other reason than it was an old smartphone I had.
OS: LineageOS 20 (non official)
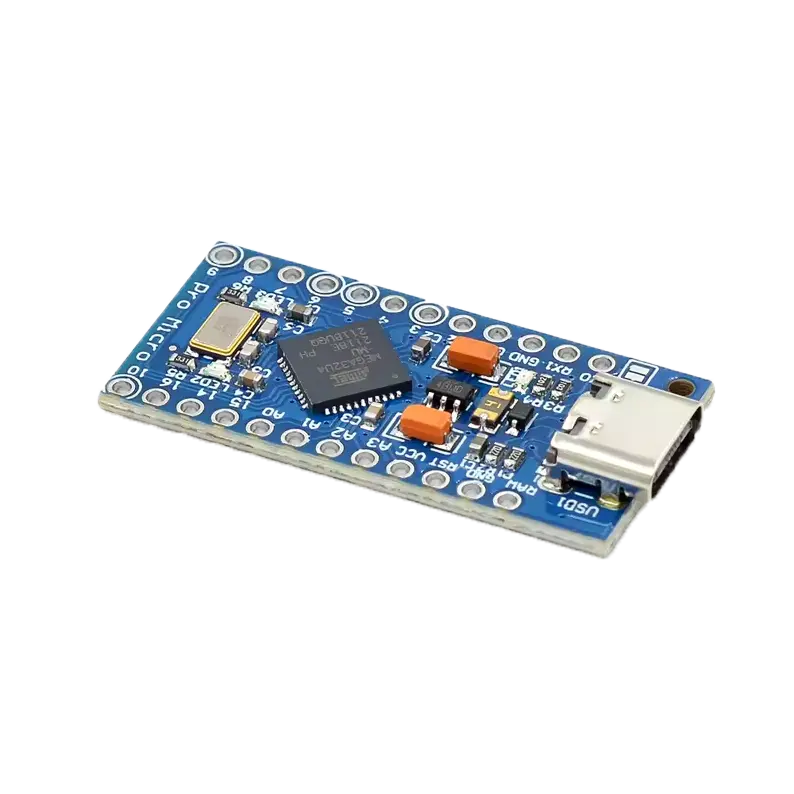
Microcontroller
Pro Micro / Leonardo
Pro Micro USB-C clone board that for some reason only works when read as an Arduino Leonardo.
Electronics
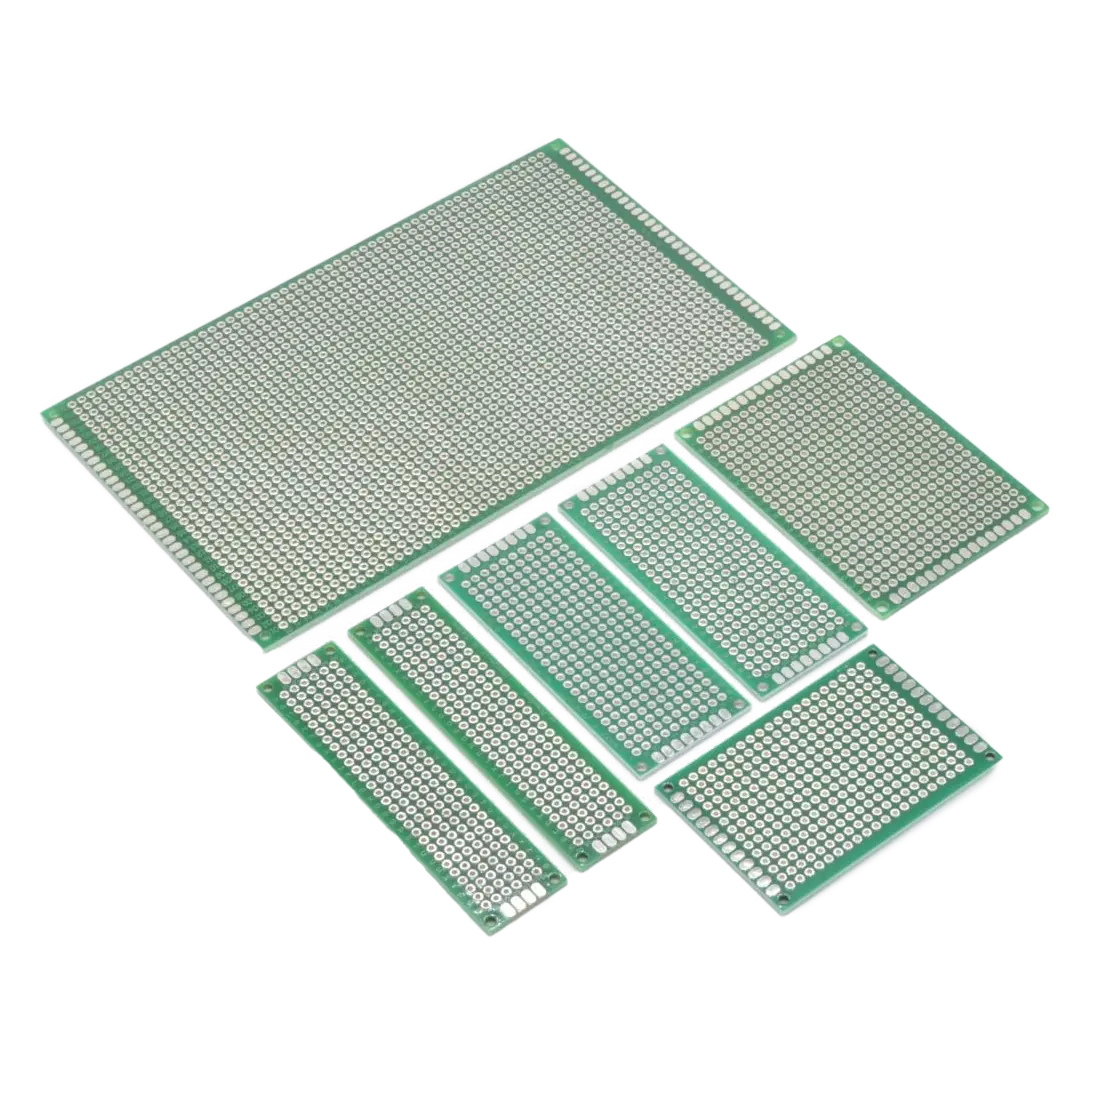
Perfboards
Perfboards to house the buttons (manually cut to size).
Electronics
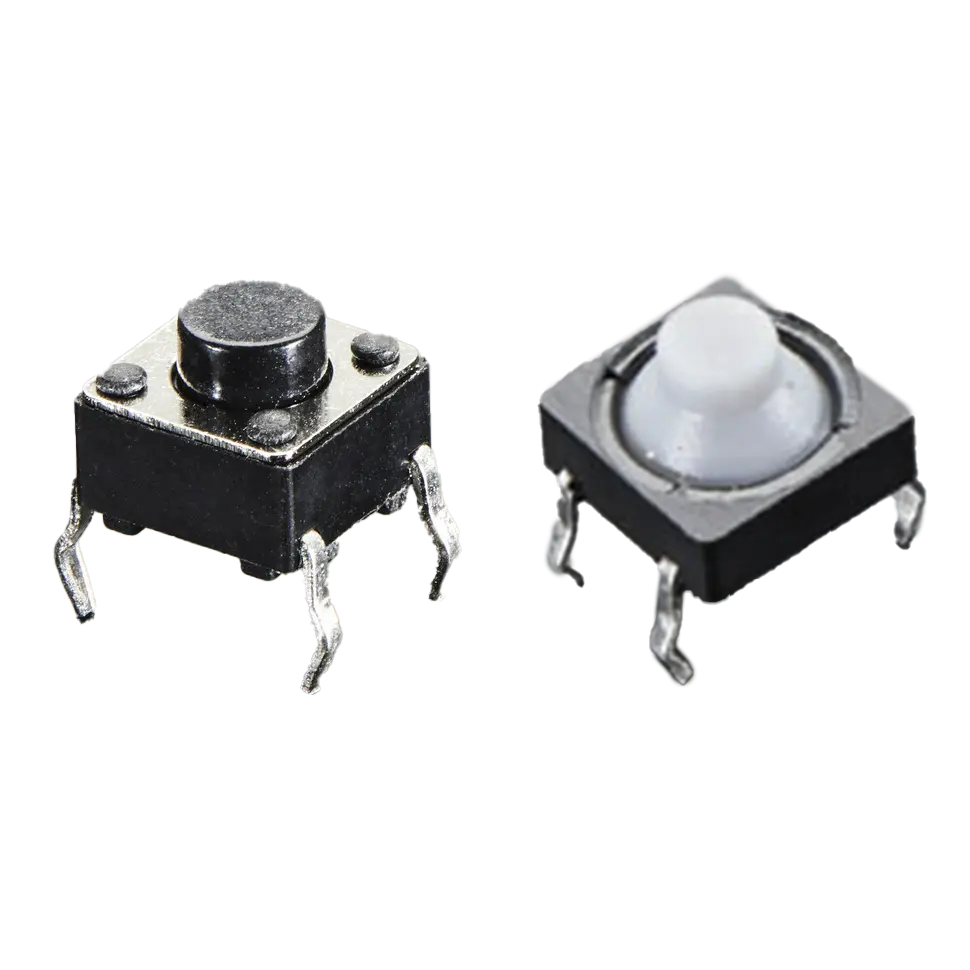
Push buttons
Push buttons. Mix of soft (push buttons and DPAD) and standard tactile buttons (everything else)
Electronics
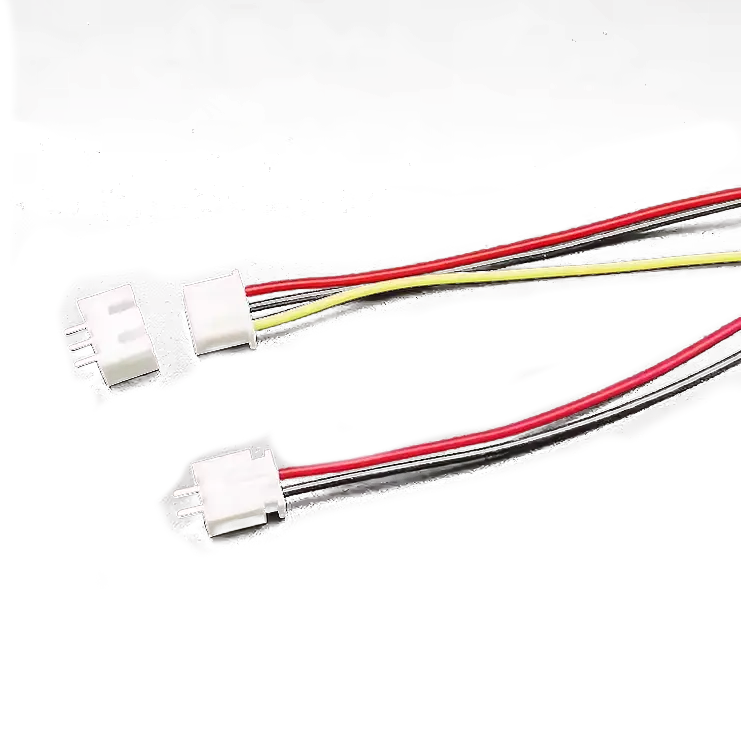
Cables and connectors
Set of cable and JST connectors (optional) to connect everything.
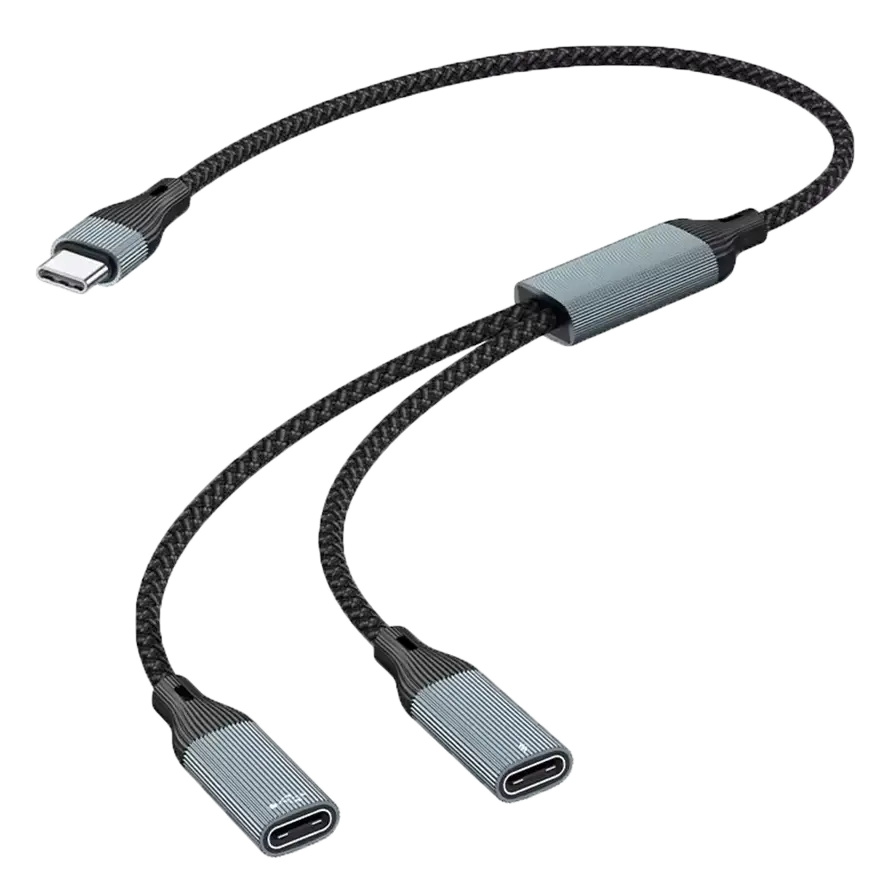
Electronics
USB-C OTG cable splitter
Splitter needed to connect the Pro Micro and have another slot for charging.
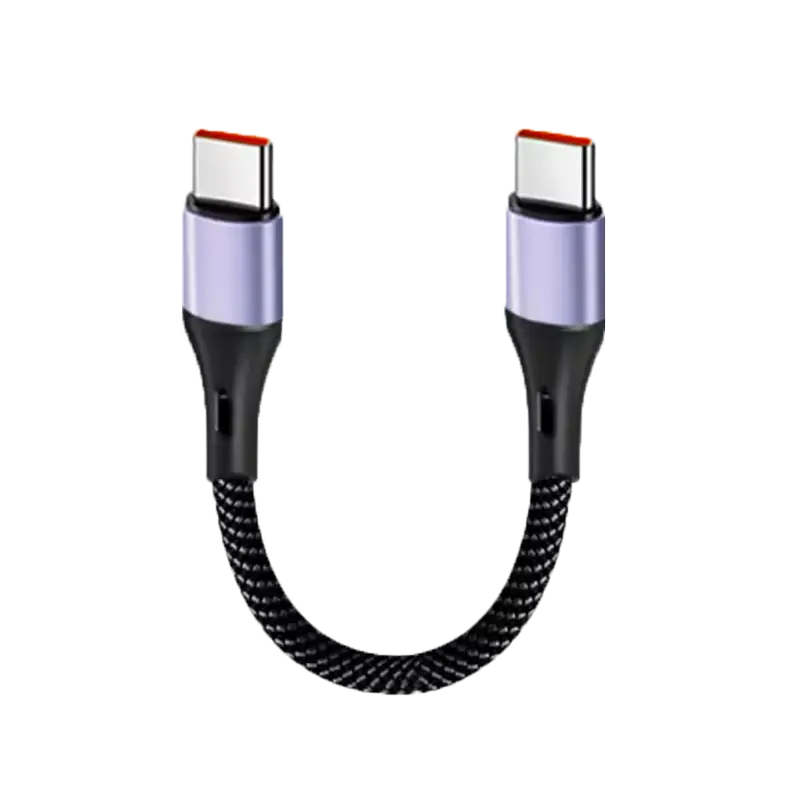
Electronics
USB-C cable (male to male)
USB-C cable needed to connect the Arduino to the splitter.
Software
Here’s a list of the software I used and the tutorials I used to install and configure them. This project page won’t cover LineageOS installation and ES-DE configuration; below are the links to the resources I used.
The arduino code will be covered in section 01 | Design | Code
Android version
LineageOS 20 (non official) from the community at XDA forums
The process to unlock the bootloader is a bit involved. I suggest doing this mod only if you’re comfortable with opening your smartphone.
Launcher
ES-DE Frontend for android
Gaming frontend for Android.
See next box for installation and configuration instructions.
Emulators
Guide from Retro Game Corps
To setup the emulators I used a guide from Retro Game Corps (link below).
Believe it or not, I also actually ripped my own video games ROMs.
Arduino library
Arduino Joystick Library by MHeironimus
To program the Arduino I wrote a sketch based on the Arduino Joystick Library by MHeironimus.
More on that in the “01 | Design” section.
00 | Research |
Inspiration
The two main sources that inspired me to start this project are two YouTube videos:
Leandro Linares
“Designing my own Game Console”
2022 video by Leandro Linares on how he made a portable game console using a Raspberry Pi and RetroPie
CNCDan
“I built the controller no one else would!”
2024 video by CNCDan on how he designed and built a custom controller.
01 | Design
01 | Design |
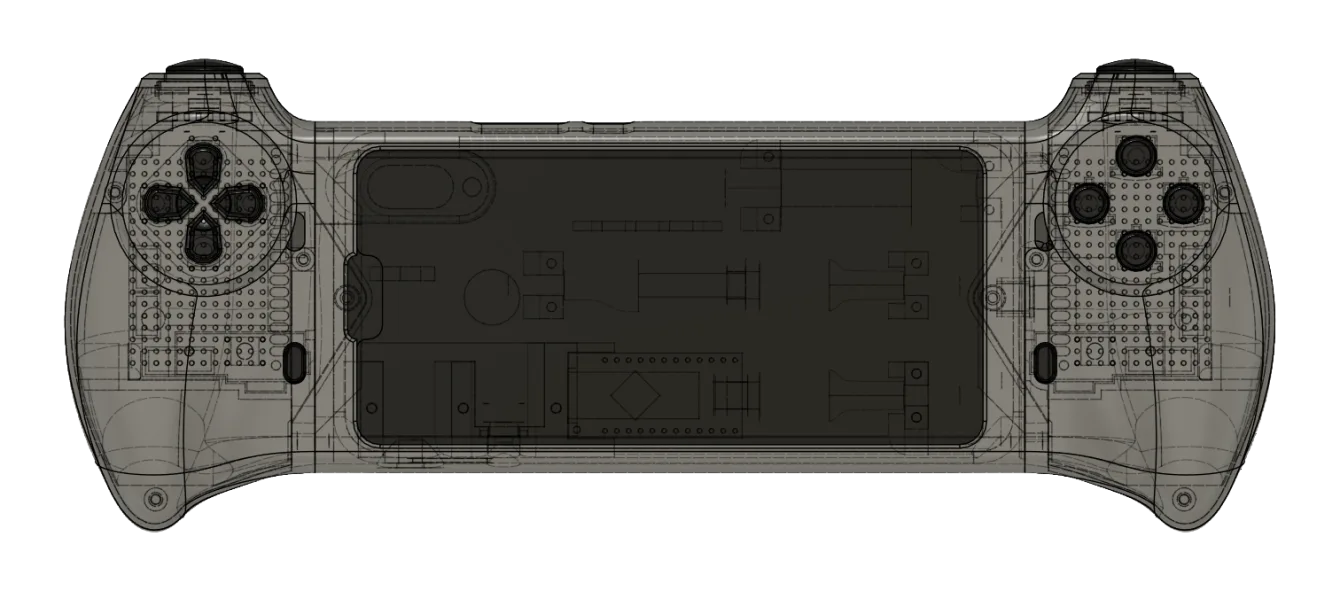
Product design
Early sketches and inspiration
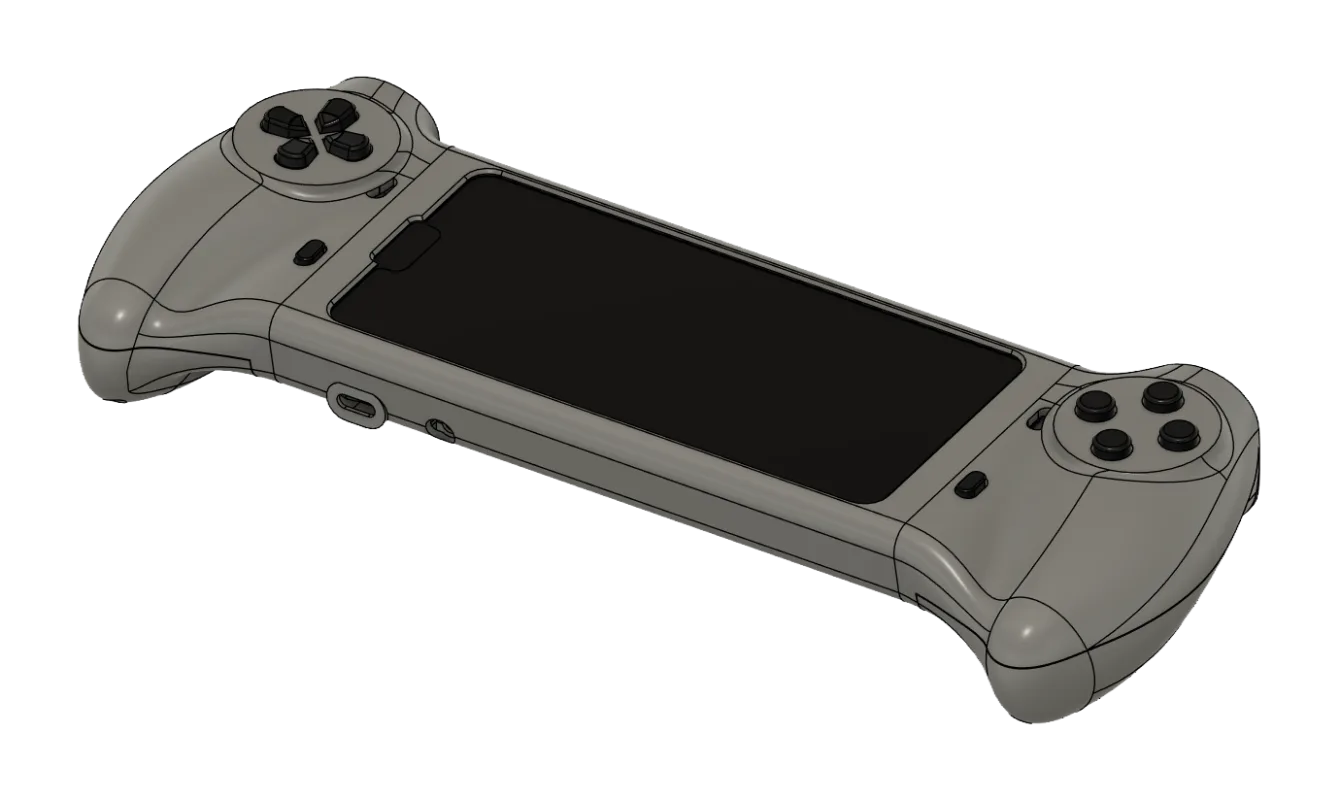
Since the console is meant to play PS1 games it seemed obvious to mirror the PlayStation button layout. The main sources of inspiration were the Dualshock controllers.
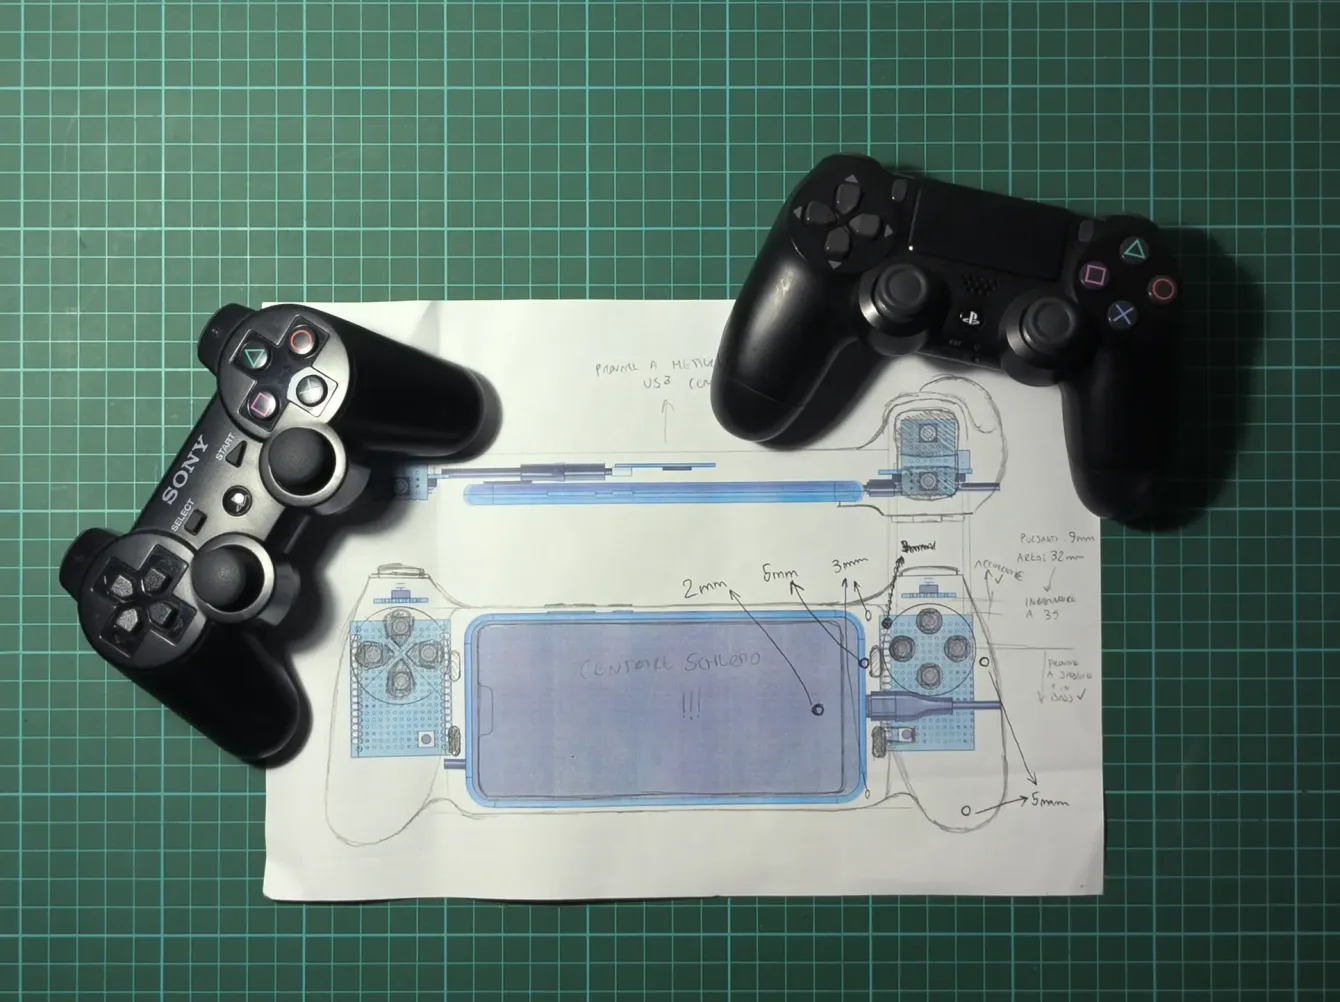
Product design features
The console shell is built to achieve two goals:
- Ergonomics
- Modularity
All the design decisions were made keeping this two concepts in mind
02 | Prototype
02 | Prototype |
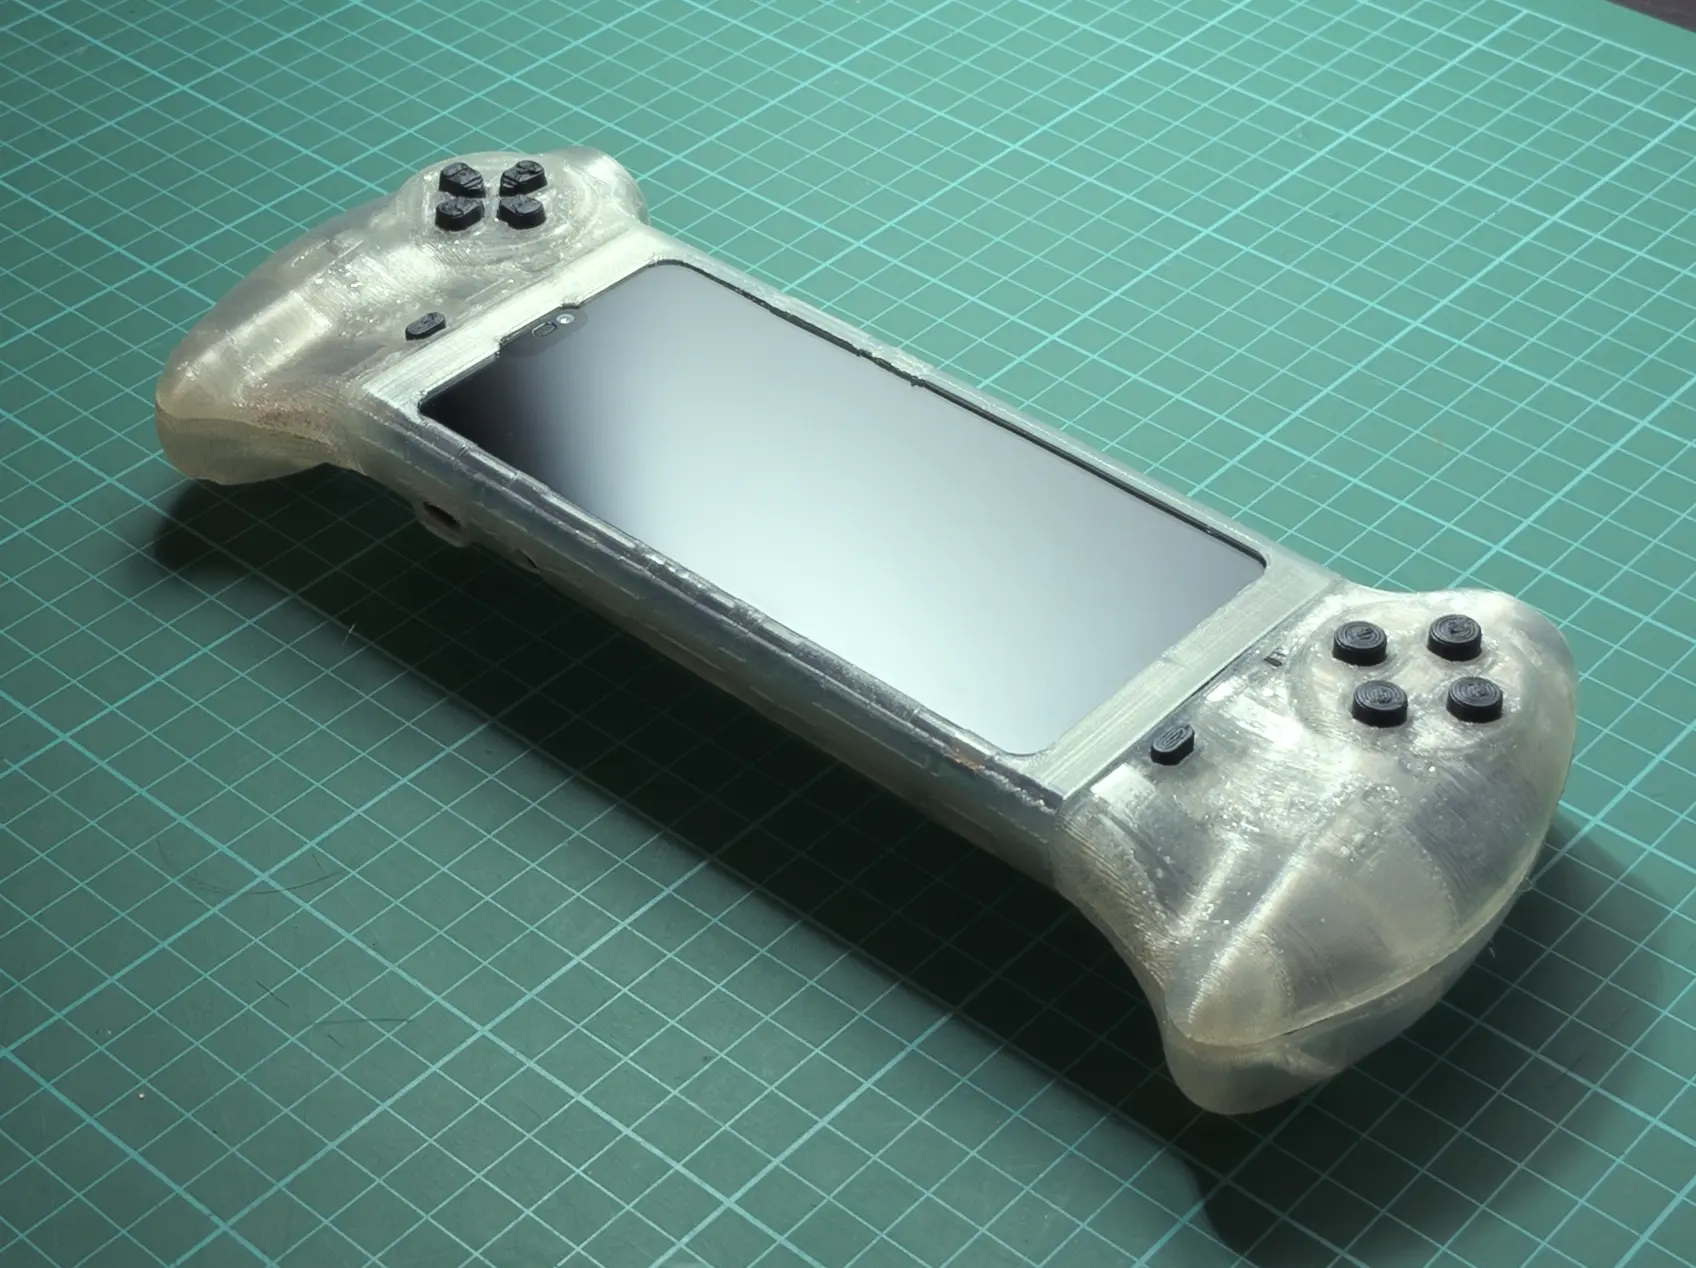
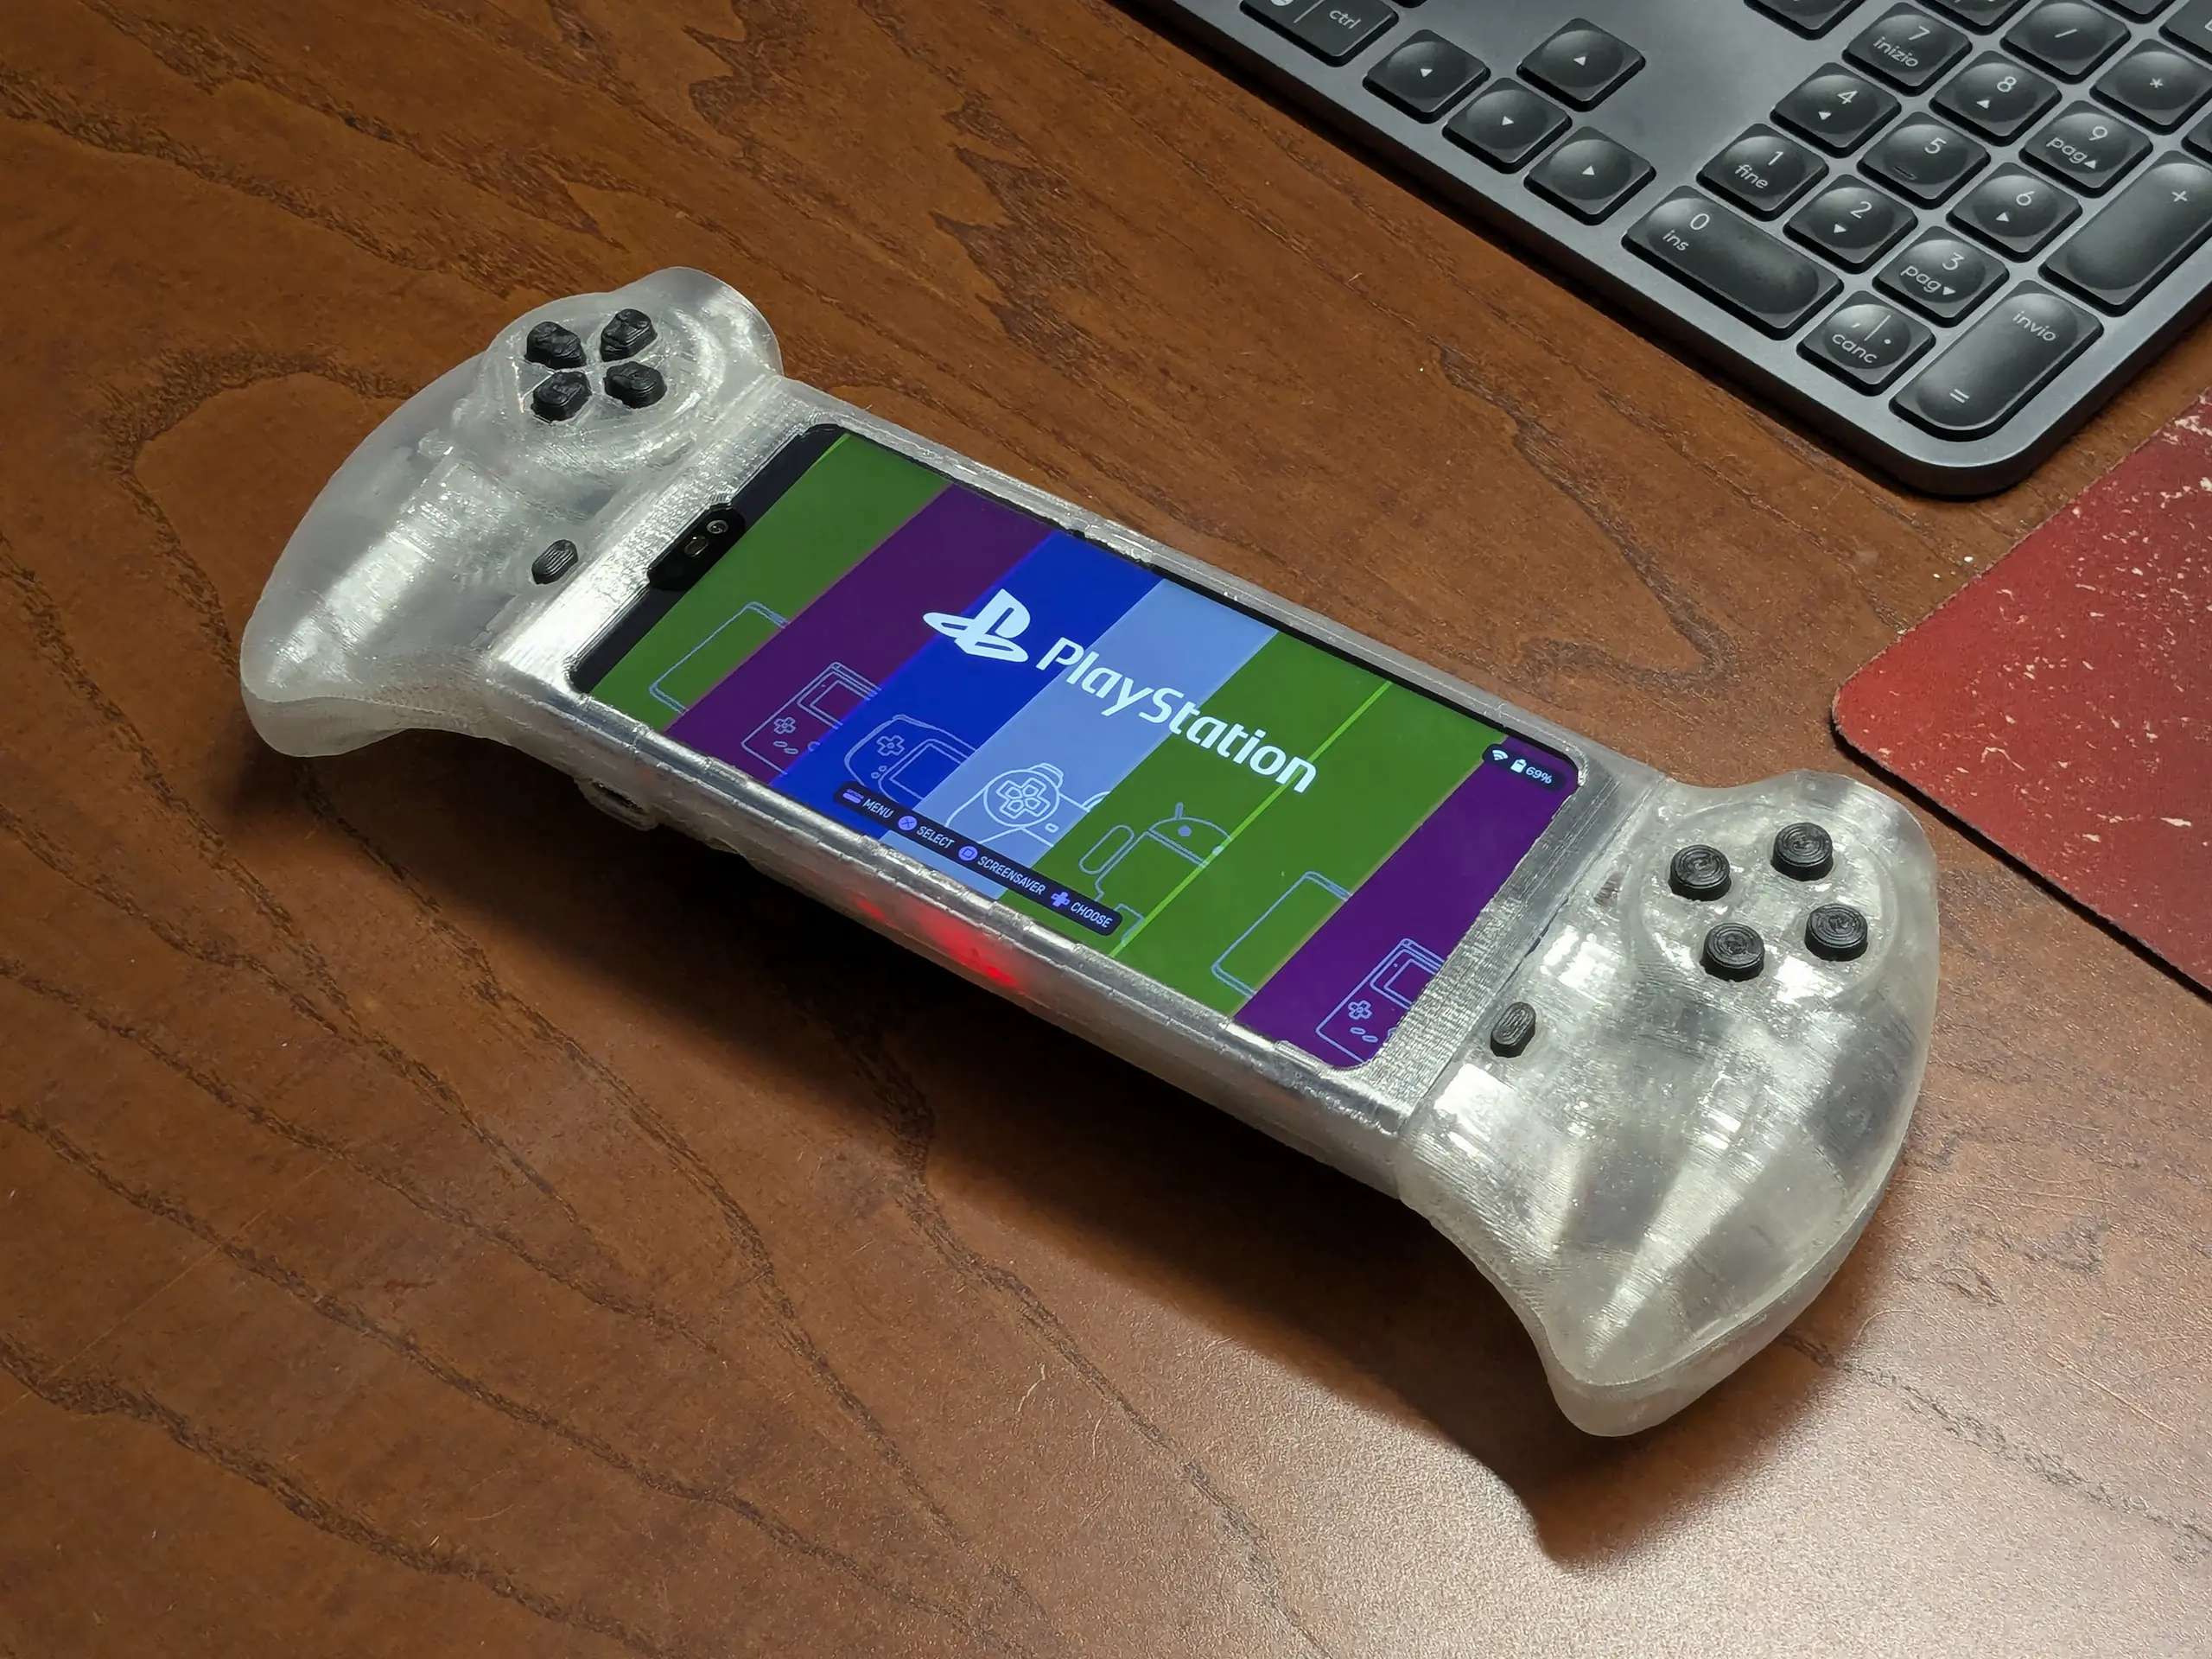
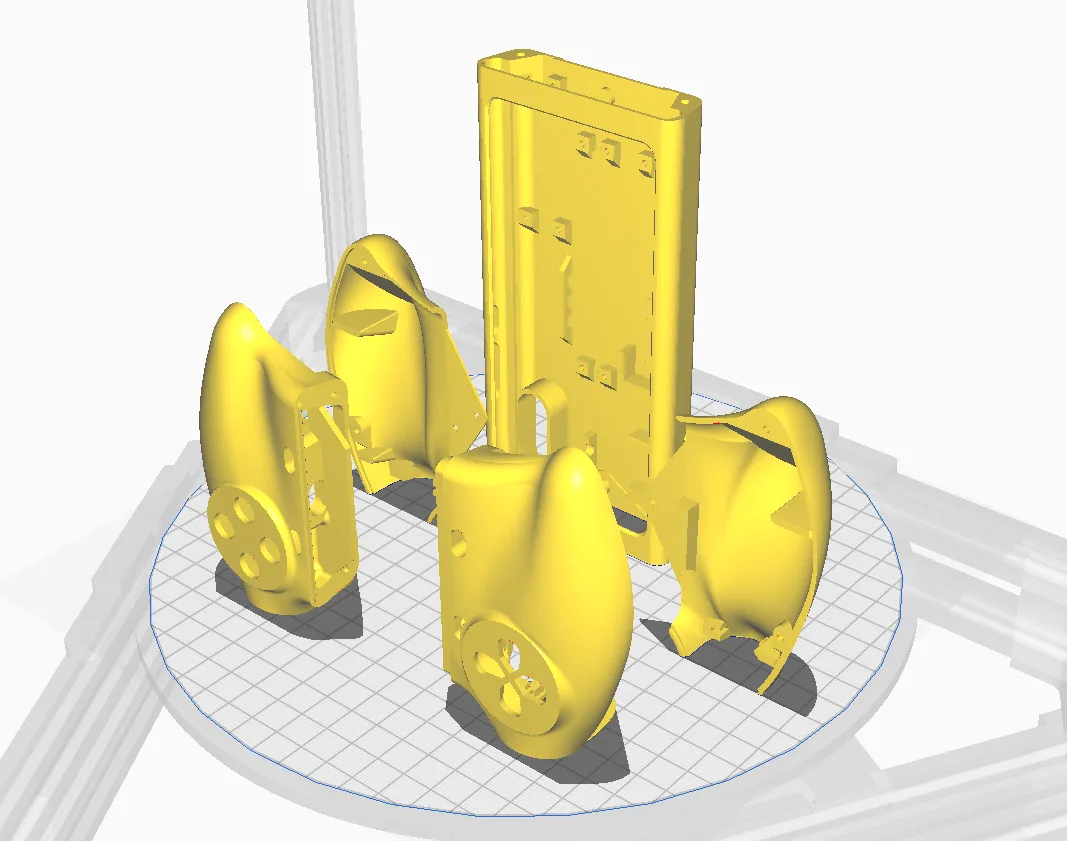
3D printed parts
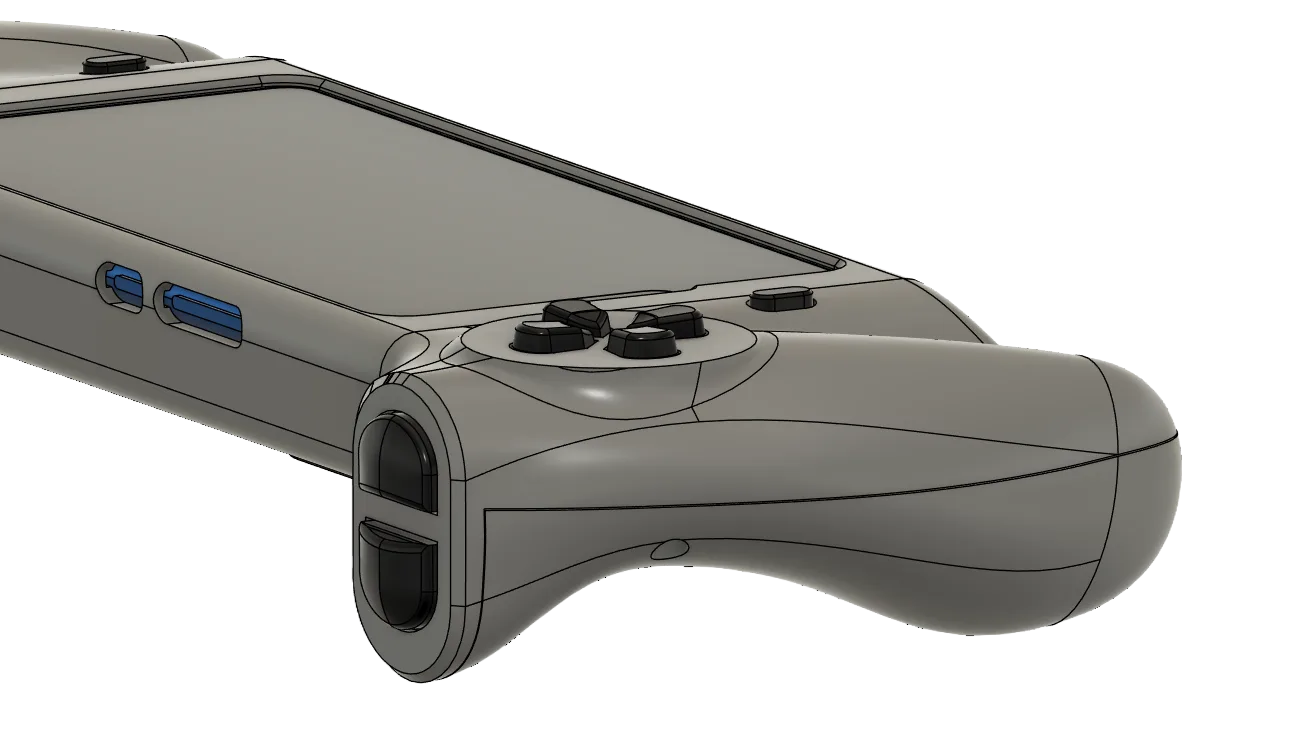
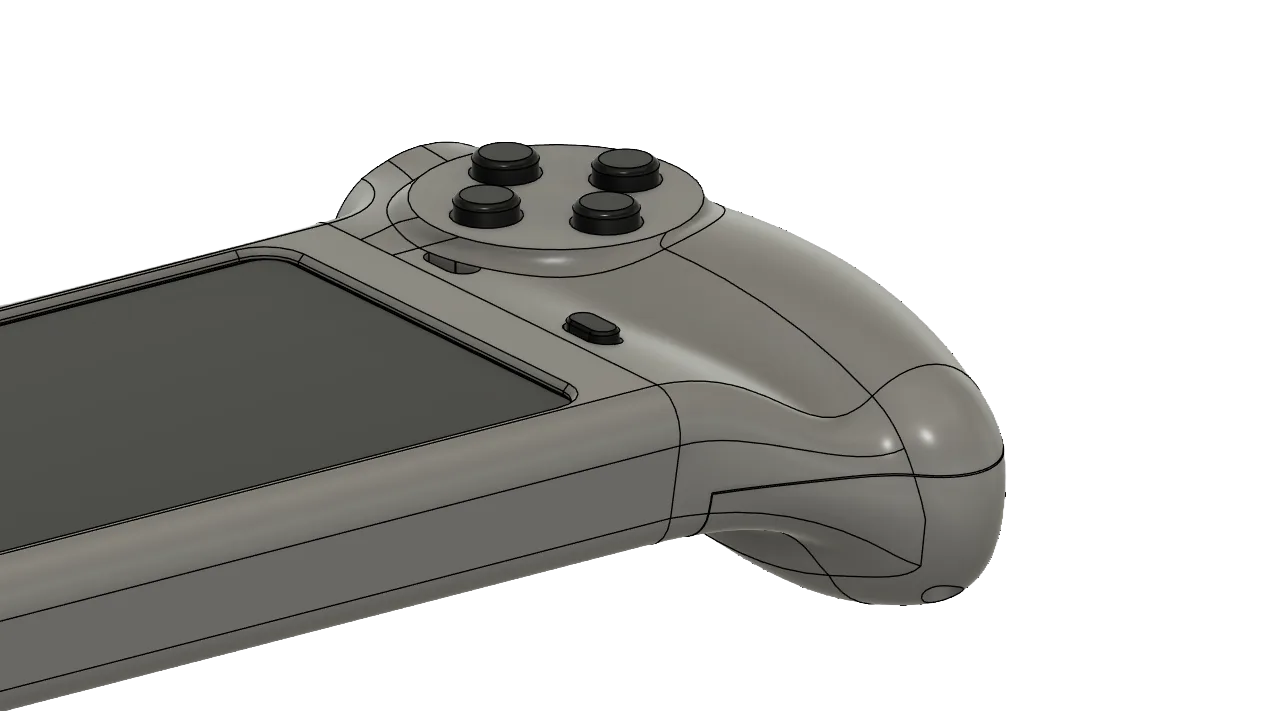
The shell is designed to be 3D printed vertically, using the higher resolution of the Z axis of an FDM 3D printer to achieve a better finish of the parts while limiting the aumont of supports needed.
02 | Prototype |
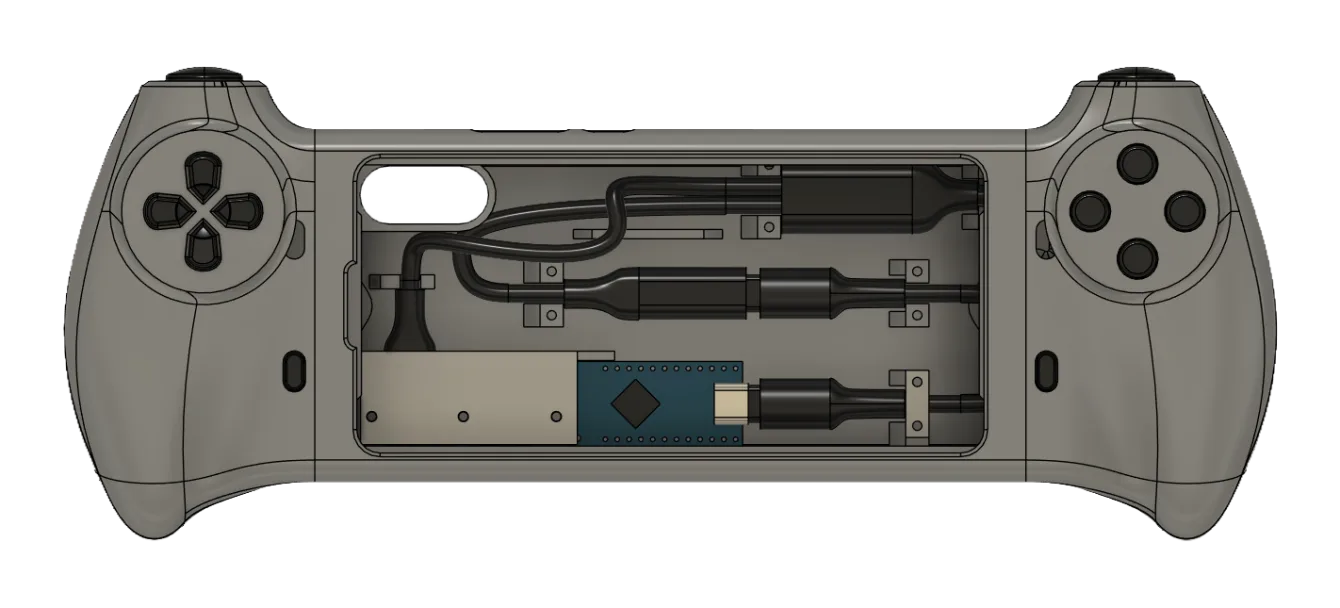
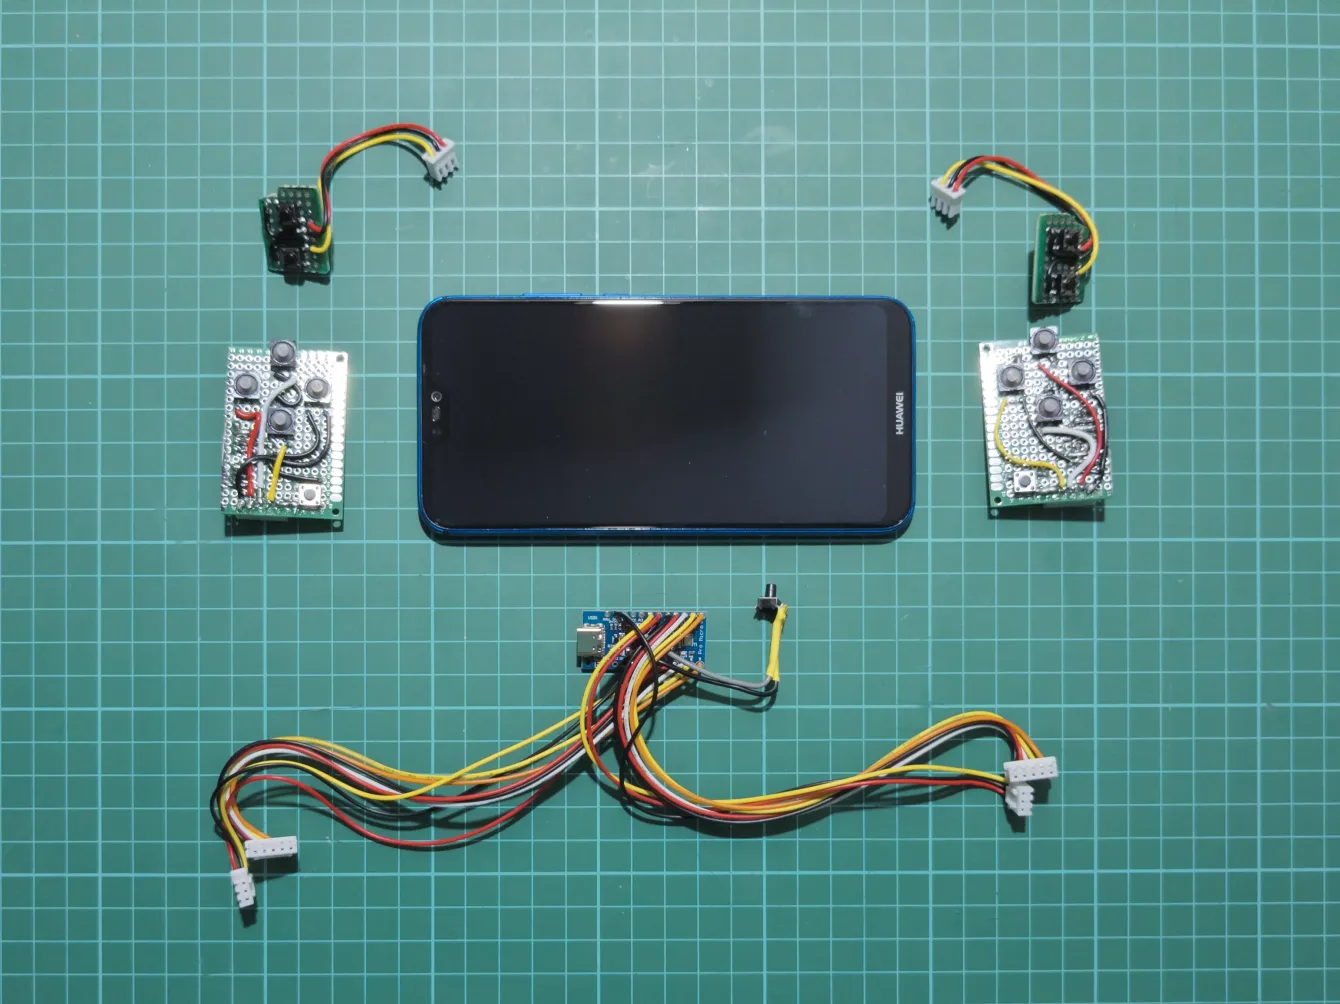
Electronics
The electronics consist of four perfboards connected by wires and JST connectors to an Arduino Pro Micro clone board.
See the 00 | Research | hardware and the 03 | make sections for more details on the components and assembly.
The buttons are a mix of soft (push buttons and DPAD) and standard tactile buttons (everything else)
02 | Prototype |
Code
The code runs on a Pro Micro or Arduino Leonardo board. It’s based on the “Simple arcade stick example” from the “Arduino Joystick Library by MHeironimus.
The pinout has been “manually” optimized to run on the P20 lite – which for some unknown reason doesn’t support the standard Xinput pinout. With the modified code the P20 lite recognizes all the buttons without additional configuration needed with the exception of start and select not being recognized in some apps like ES-DE (it works in all the other emulators though).
Github code
p20-lite-handheld-console repository
This repository contains the code for P20 lite to handheld console convertion.
02 | Prototype |
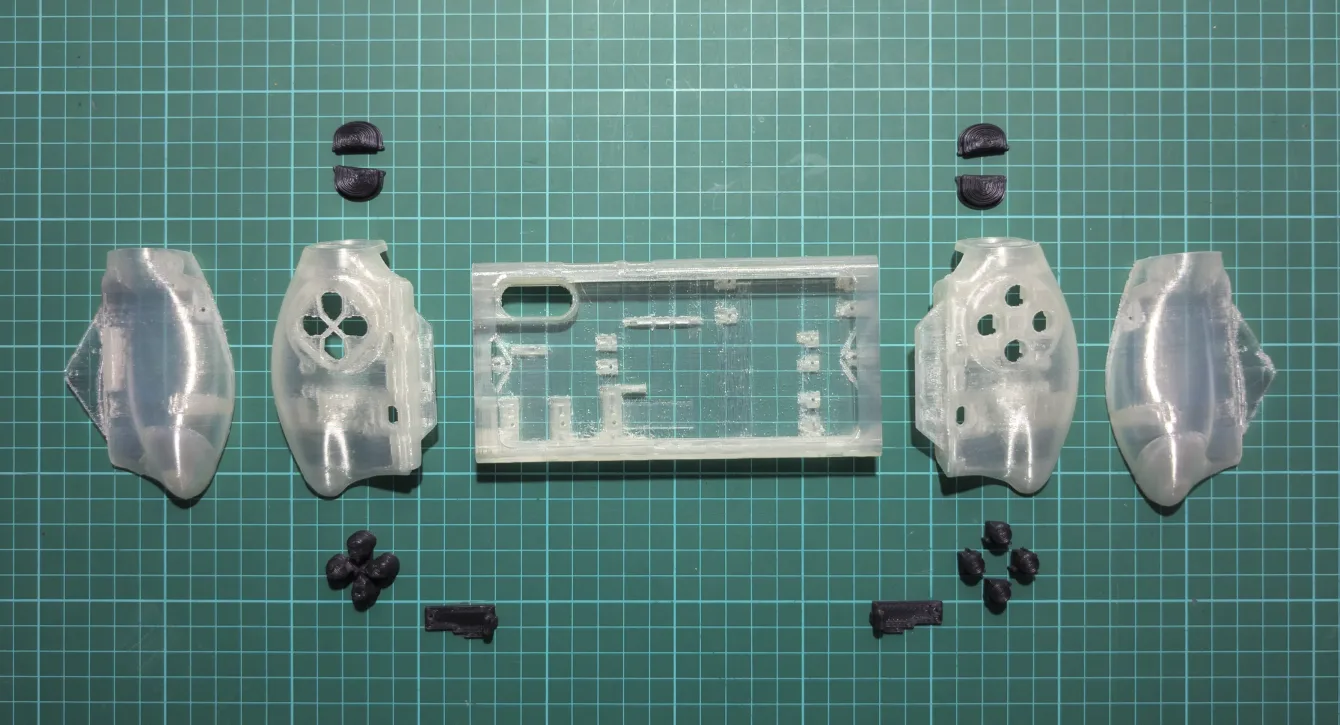
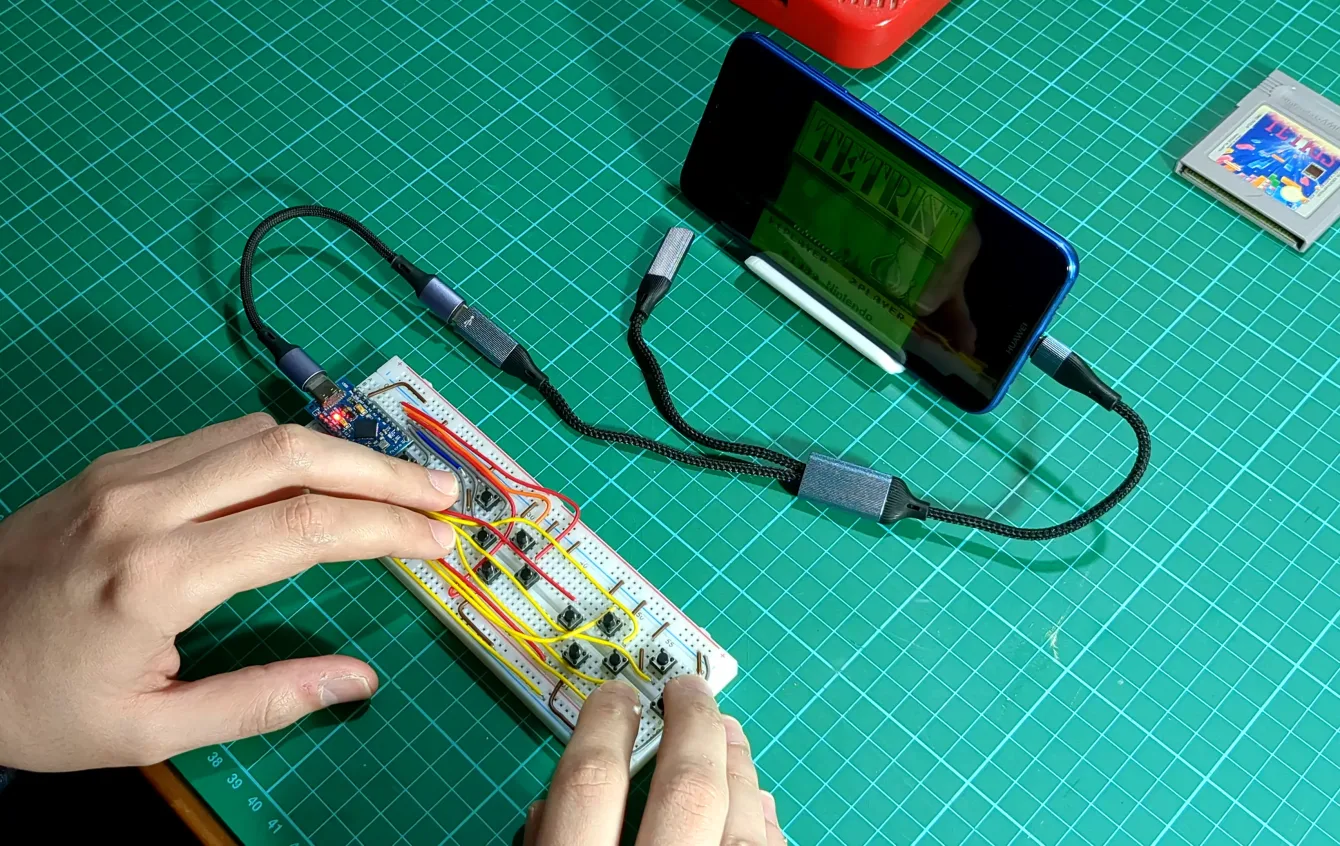
v0 – Components testing
The first prototype was on a breadboard in order to test all the hardware components, code and software compatibility.
02 | Prototype |
v1 – Ergonomics test
Work in progress
02 | Prototype |
v2 – v4 – Design iteration
Work in progress
03 | Make
03 | Make |
v5 – Final Design
Work in progress
03 | Make |
Testing
Work in progress
04 | Conclusion
04 | Conclusion |
Successes
Work in progress
04 | Conclusion |
Failures
Work in progress
04 | Conclusion |
Things to improve
Work in progress